Detecting dice with Tensorflow

Spencer Miskoviak
January 8, 2023

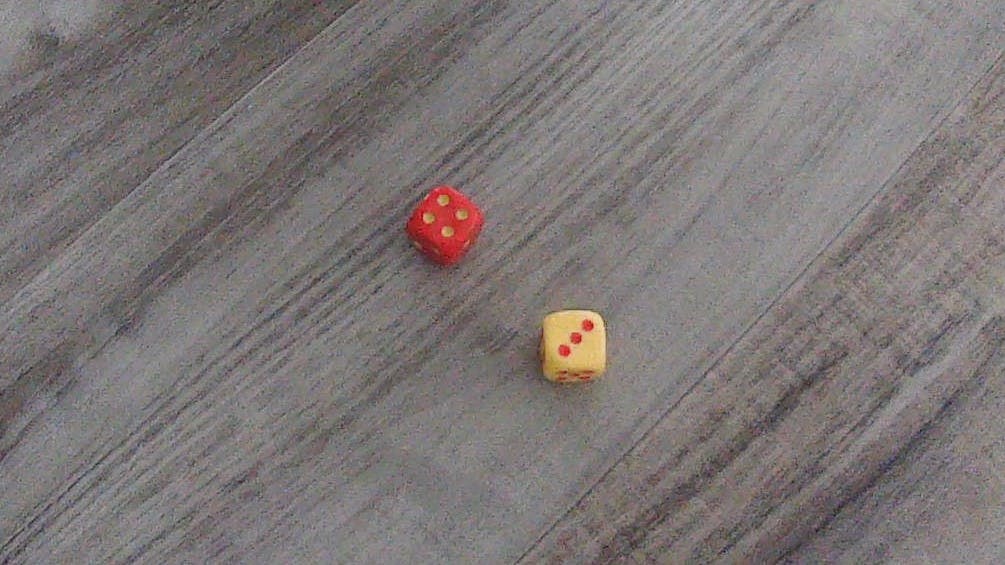
Photo by Robert Stump
While playing a game of Catan, I thought it would be interesting to automate summing the two dice rolled at the beginning of each turn. The actual usefulness is marginal, but it seemed like a fun challenge and opportunity to try using Tensorflow in a web app.
This post outlines the learnings along the way and the resulting web app.
Getting started
Since I've never worked with Tensorflow, it started with a few hours of googling, reading, and tinkering to understand the basics of how it works. A combination of the documentation, blog posts, and open source examples helped stitch together a working prototype.
Installation
The first challenge was installing the necessary tooling to use Tensorflow. This was a somewhat self-imposed challenge since I was working on a Windows machine using Ubuntu via WSL2 (Windows Subsystem for Linux). I imagine this step would be trivial if using macOS or a Linux distribution directly.
WSL2 was already set up, but I updated Windows, WSL, and the GPU driver for good measure. Then, followed the remaining steps, notably installing conda to manage the Python version and packages.
With everything set up, it was time to begin training the Tensorflow models.
Training
The training process was iterative, going back and forth between gathering data, labeling, building the model, and testing.
Gathering data
The first step in training the model was gathering the training data. In this case, that was images of dice. I set up a webcam and took pictures of dice in various orientations. This was a tedious process, so the training dataset wasn't as large as it would have ideally been.
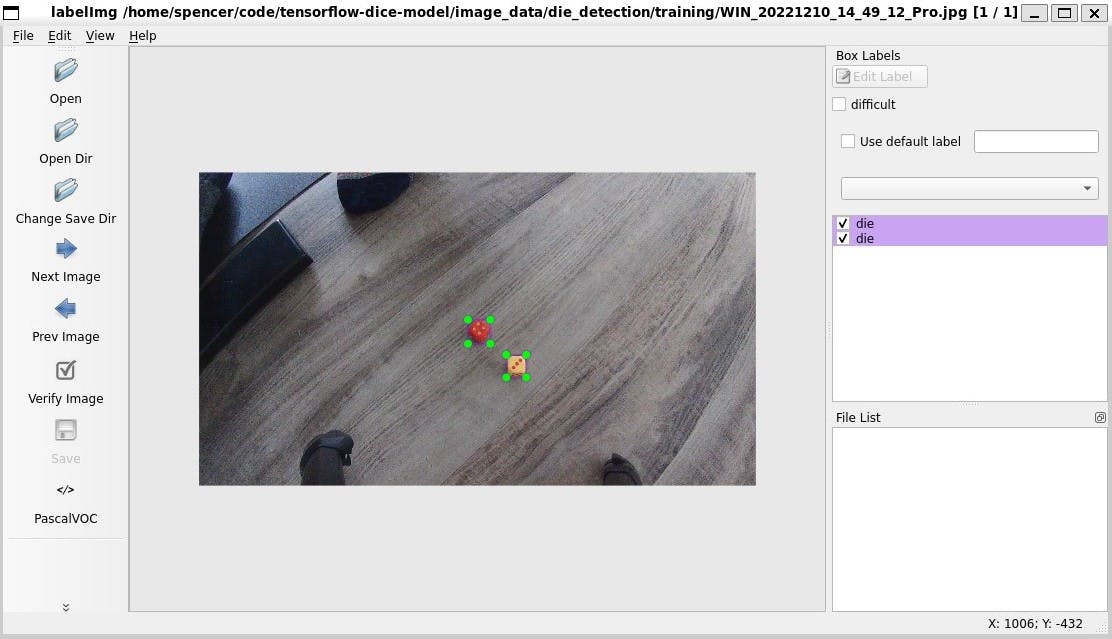
Once all these images of dice were gathered, the next step was to manually label the images. At first, I used Make Sense — a web app for labeling training data — but ended up using labelImg — a desktop application — to label all the images.
Below is an example of using labelImg to annotate the location of the dice in the training data.
The various training data sets are all available on GitHub.
Training the model
The next step was to train the Tensorflow models. I used Tensorflow Lite (TFLite) because it supports deploying the trained models to mobile devices and web apps. This blog post was helpful in building a TFLite object detection model.
One stage approach
At first, I tried to use a single model to both detect (find the die in an image) and classify (determine a die's value). The training data for that approach is in the die_detection_and_classification directory. The labels.csv file within this directory contains the labeling data, which includes the actual value of the die (1-6).
This training set is small, so the model performed poorly in classifying the die value, but did well detecting the die within an image. This approach may be effective with sufficient training data. Instead, I opted for a two-stage solution where the first model would detect the die and the second model would classify the die, inspired by this blog post.
Two-stage approach
A two-stage approach means there needed to be two sets of training data: one set for the die detection and one set for the die classification. Fortunately, the previous training data could be reused since it already labeled each die's location. This training data is in the die_detection directory.
Since the first stage model is trying to find dice within an image, an object detection model is a perfect fit.
import os

from tflite_model_maker import model_spec
from tflite_model_maker import object_detector

import tensorflow as tf
assert tf.__version__.startswith('2')

# Define which object detection model architecture to use
# depending on the model and situation.
#
# There are 5 models:
#   - efficientdet_lite0 (smaller, faster, less precise)
#   - efficientdet_lite1
#   - efficientdet_lite2
#   - efficientdet_lite3
#   - efficientdet_lite4 (large, slower, more precise)
#
# See: https://www.tensorflow.org/lite/models/modify/model_maker/object_detection#quickstart
spec = model_spec.get('efficientdet_lite3')

# Load the labeled training data.
#
# The training data is in the PASCAL VOC format, which `labelImg` supports.
#
# `DataLoader` also supports `from_csv`.
#
# See: https://www.tensorflow.org/lite/api_docs/python/tflite_model_maker/object_detector/DataLoader
# See: http://host.robots.ox.ac.uk/pascal/VOC/
train_data_path = os.path.join("..", "..", "image_data", "die_detection", "training")
train_dataloader = object_detector.DataLoader.from_pascal_voc(
  train_data_path,
  train_data_path,
  ['die']
)

# Load the labeled validation data.
validation_data_path = os.path.join("..", "..", "image_data", "die_detection", "validation")
validation_dataloader = object_detector.DataLoader.from_pascal_voc(
  validation_data_path,
  validation_data_path,
  ['die']
)

# Create an object detection model using the training data.
#
# See: https://www.tensorflow.org/lite/api_docs/python/tflite_model_maker/object_detector/create
model = object_detector.create(
  train_dataloader,
  model_spec=spec,
  epochs=40,
  batch_size=8,
  train_whole_model=True,
  validation_data=validation_dataloader
)

# Output the trained model for use in apps.
model_output_dir = os.path.join("..", "..", "output_models", "die_detection")
model.export(export_dir=model_output_dir)
Running this Python script will output a model.tflite file which contains the resulting trained model. This file can then be loaded into apps to use.
Another Python script was used to load this model file, process an image, and draw a box around any detected dice. An example of the output is below.
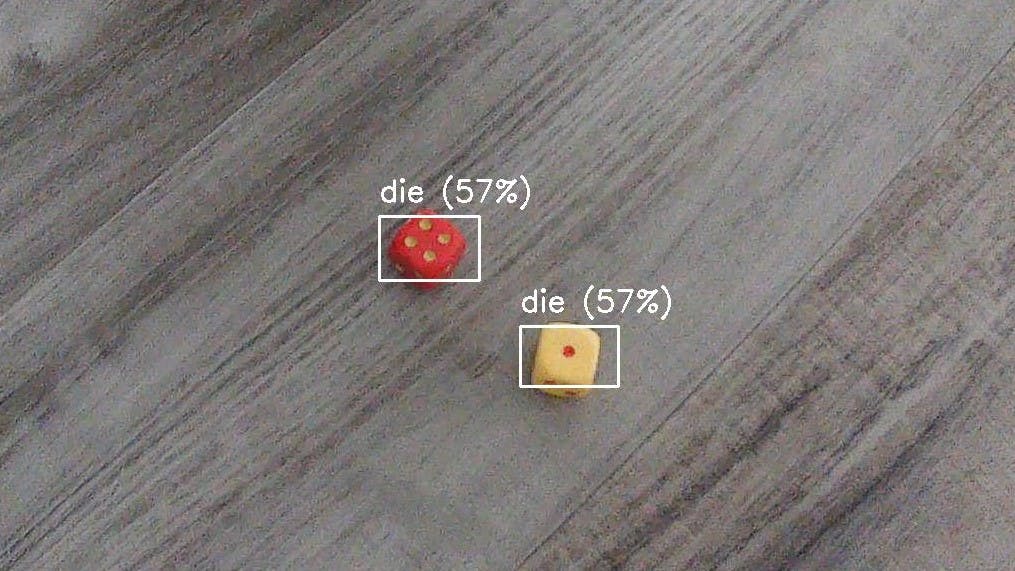
The first stage is complete, the model does well detecting die. This could be improved with more training data or altering the parameters such as the model architecture, epochs, batch size, etc.
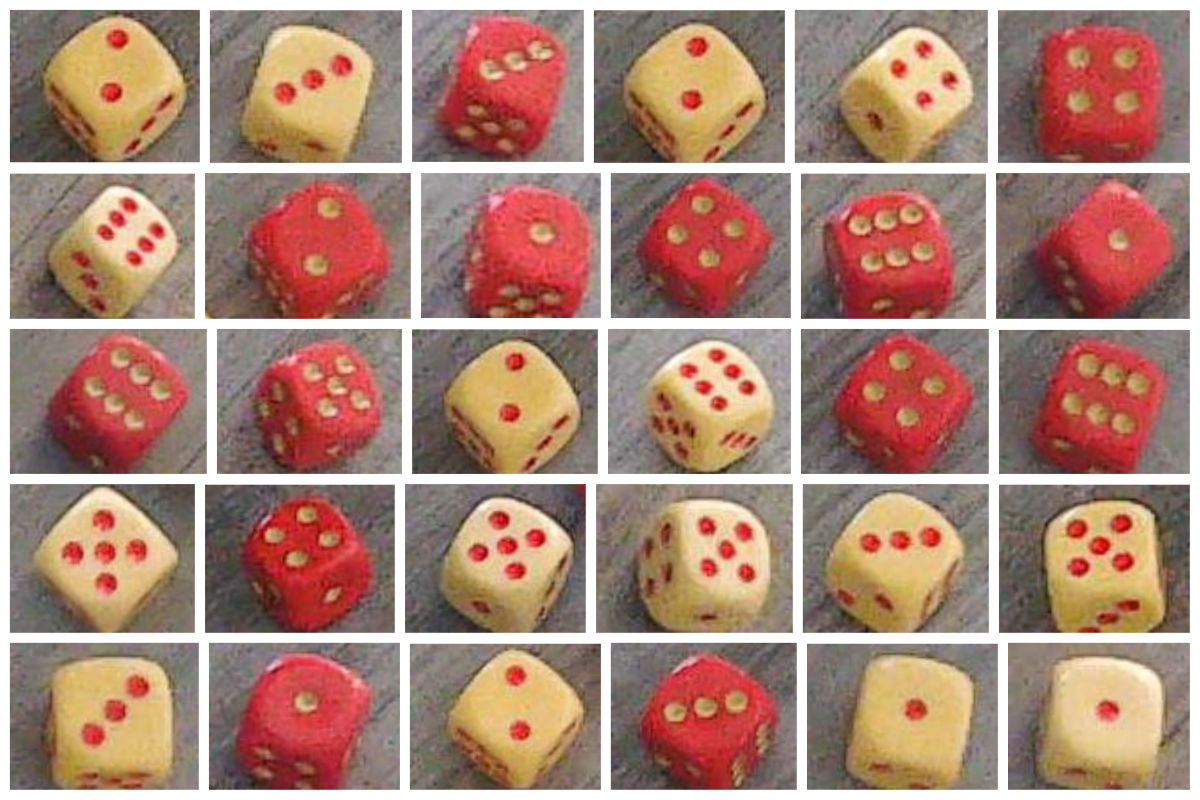
The second stage is to then classify each die. Instead of collecting more training data manually, this first stage was used to generate the training data for this second model. Another Python script took the training data for the first stage and ran it through the trained object detection model and the results were used to then crop each die from the image and output them in another directory. I could then manually sort each die into its correct class directory (one, two, three, four, five, six).
A sample of the die classification training data is below, the full dataset is in the die_classification directory.
For the second stage model, an image classification model was used since there are six discrete classes a given die could be.
import os

import tensorflow as tf
assert tf.__version__.startswith('2')

from tflite_model_maker import model_spec
from tflite_model_maker import image_classifier
from tflite_model_maker.image_classifier import DataLoader

# Define which image classification model architecture to use
# depending on the model and situation.
#
# There are 7 models: mobilenet_v2, resnet_50, efficientnet_lite0 - efficientnet_lite4
spec = model_spec.get('resnet_50')

# Load the labeled training data.
#
# The image data of the same label are in the same subdirectory.
#
# See: https://www.tensorflow.org/lite/api_docs/python/tflite_model_maker/image_classifier/DataLoader
data_path = os.path.join("..", "..", "image_data", "die_classification", "training")
data = DataLoader.from_folder(data_path)
train_data, test_data = data.split(0.9)

# Create an image classifier model using the training data.
model = image_classifier.create(train_data, model_spec=spec, epochs=30)

# Output the trained model for use in apps.
model_output_dir = os.path.join("..", "..", "output_models", "die_classification")
model.export(export_dir=model_output_dir)
Running this Python script will output another model.tflite file.
This model unfortunately performs poorly in classifying die. A larger, broader training dataset would likely improve its performance. It's possible there are other parameters that also need to be adjusted. However, the model exists and is sufficient for creating a web app.
Building a web app
The final step is to actually use these trained models in an app. The TFLite JavaScript demo app helped understand the basics of how to deploy and use a trained TFLite model in a web app.
This started by initializing a new Nextjs web app since it takes care of a lot of the standard web app boilerplate.
Then the TFLite JavaScript dependencies were added to support importing and using the trained TFLite models.
# TensorFlow.js Core API, which provides low-level operations.
npm i @tensorflow/tfjs-core

# Implements a JavaScript based CPU backend to TensorFlow.js.
npm i @tensorflow/tfjs-backend-cpu

# Enables running arbitrary TFLite models on the web.
npm i @tensorflow/tfjs-tflite
These packages can then be imported and used.
import "@tensorflow/tfjs-backend-cpu";
import type { TFLiteModel } from "@tensorflow/tfjs-tflite";
import { useEffect, useState } from "react";

export const Component = () => {
  const [detectionModel, setDetectionModel] = useState<TFLiteModel>();
  const [classifierModel, setClassifierModel] = useState<TFLiteModel>();

  useEffect(() => {
    const loadTensorflowModels = async () => {
      // Imported dynamically to avoid issues with Nextjs server rendering.
      const { loadTFLiteModel, setWasmPath } = await import(
        "@tensorflow/tfjs-tflite"
      );

      // This is necessary for TFLite to load correctly.
      //
      // See: https://github.com/tensorflow/tfjs/tree/master/tfjs-tflite#set-wasm-modules-location-optional
      setWasmPath(
        "https://cdn.jsdelivr.net/npm/@tensorflow/tfjs-tflite@0.0.1-alpha.8/dist/"
      );

      // Load the two trained models. These were copied from
      // the model maker output above, renamed, and added to
      // the Nextjs `public` directory.
      const loadedClassifierModel = await loadTFLiteModel(
        "/classifier_model.tflite"
      );
      const loadedDetectionModel = await loadTFLiteModel(
        "/detection_model.tflite"
      );

      // Save the models in component state so they can then be used
      // to make predictions.
      setClassifierModel(loadedClassifierModel);
      setDetectionModel(loadedDetectionModel);
    };

    loadTensorflowModels();
  }, []);

  return null;
};
This code provides the basics of loading a TFLite model in a web app.
In this case, since the app will make predictions based on images, there is a lot of boilerplate code to setup the webcam, take screenshots, transform the screenshot into an acceptable input using @tensorflow/tfjs-core. All of this is available in the GitHub repository.
At a high-level, when a screenshot is captured the current frame from the webcam is copied to a canvas element. That canvas element is then passed to the object detection model.
import * as tf from "@tensorflow/tfjs-core";
import type { TFLiteModel } from "@tensorflow/tfjs-tflite";

const DETECTION_MODEL_EXPECTED_DIMENSIONS = 512;

// The canvas element which represents a frame from the webcam.
// The object detection model was already loaded above.
const detectObjects = ({
  canvasElement,
  detectionModel,
}: {
  canvasElement: HTMLCanvasElement;
  detectionModel: TFLiteModel;
}) => {
  const outputTensor = tf.tidy(() => {
    // Get pixel data from the canvas using Tensorflow core APIs.
    const img = tf.browser.fromPixels(canvasElement);

    // Normalize and transform the input data in the way the model expects.
    const data = tf.expandDims(
      tf.image.resizeBilinear(img, [
        DETECTION_MODEL_EXPECTED_DIMENSIONS,
        DETECTION_MODEL_EXPECTED_DIMENSIONS,
      ])
    );
    const input = tf.cast(data, "int32");

    // Predict where the dice are in the image.
    const outputTensor = detectionModel.predict(input) as tf.NamedTensorMap;

    return outputTensor;
  });

  // Unwrap the output predictions.
  //  The first tensor represents the confidence scores for each prediction.
  //  The second tensor represents the coordinates/dimensions for the prediction.
  //  The third tensor represents the total count of objects detected.
  const [scoreKey, boxKey, countKey, _classKey] = Object.keys(outputTensor);
  const scores = outputTensor[scoreKey].dataSync();
  const boxes = outputTensor[boxKey].dataSync();
  const count = outputTensor[countKey].dataSync()[0];

  // Transform the predictions into a more usable format.
  let results: DetectionResultMetadata[] = [];
  for (let i = 0; i < count; i++) {
    if (scores[i] > 0.2) {
      const ymin = boxes[i * 4];
      const xmin = boxes[i * 4 + 1];
      const ymax = boxes[i * 4 + 2];
      const xmax = boxes[i * 4 + 3];

      results.push({
        boundingBox: { xmin, ymin, xmax, ymax },
        score: scores[i],
      });
    }
  }

  return results;
};
This omits a lot of the boilerplate that is not unique to TFLite, but provides the core of loading and using TFLite models to make predictions in a web app. These results are then used to construct further canvas elements by cropping the original canvas only to the locations of the predicted dice. These canvas elements are then passed to the classifier model to predict the actual value of each die.
The predicted results for that roll can then be saved to keep a history of rolls. Since the classifier isn't always correct, each predicted die is clickable to correct the value if needed.
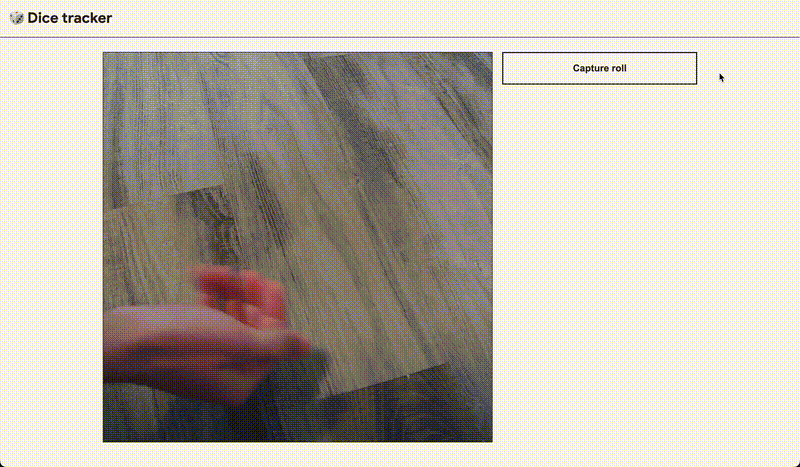
If you have dice and a webcam laying around, the web app is available here.
Conclusion
It took time to stitch together various pieces of documentation and examples mixed with guess-and-checking to get something working. Once it was working, the actual training process and usage in a web app were surprisingly powerful, with minimal code. Unsurprisingly, the most tedious part was collecting and labeling the training data.
The classifier model could likely be improved with more training data, and more expertise in adjusting the parameters.
All of the training data and models are available on GitHub, along with the web app.
Tags:
course
Practical Abstract Syntax Trees
Learn the fundamentals of abstract syntax trees, what they are, how they work, and dive into several practical use cases of abstract syntax trees to maintain a JavaScript codebase.
Check out the course